
In this issue we will take an image and discuss what makes or breaks the image. The photographs and the analysis given are selected from students contributions (with the photographers permission naturally).
| Schooner at Royal Yacht Squadron, Cowes ©Robert Culshaw |
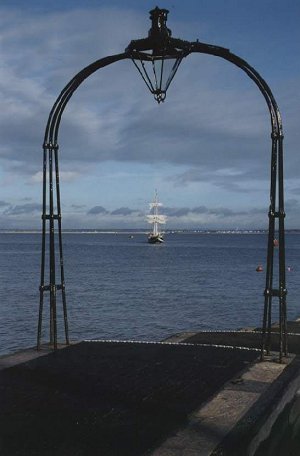 |
The image under the scalpel this issue was taken by one of our Basic Photography Course students, Robert Culshaw from the Isle of Wight in England. He had sent us a series of images for one of his projects.
This is one of his entries that we have chosen for analysis with his permission.
Sailing ships are always good subjects for photographs. Modern day vessels cannot match the detail of wood and sail on the sea.
Not only are they good subjects on the sea, as the ship here is depicted, they also offer an endless opportunity for graphic close up images of various details about the ship.
Framing the subject is a common technique used by photographers. This image is a very good example of this.
Other examples of framing would be to use doorways, archways, windows and even overhanging tree branches.
When the frame compliments the subject and isolates it within the image, it can make a very successful photograph.
Technical Quality
The exposure in this image is right on the money. There is good color and detail all the way through the image from the whites of the clouds to the dark colouring of the jetty. It isn’t difficult to get good exposures from a situation like this as the direction of the sunlight is giving fairly even lighting. However a scene with a majority of bright sky can sometimes fool a camera meter. The original image has been taken on slide film, which is all the more impressive, as exposure latitude is quite small. The advantage of slide film though is a superior quality image.
Sharpness in this image is also perfect despite the difficulties of the composition. This is a very good example of a situation where measuring depth of field is crucial for image sharpness throughout. The close proximity of the jetty and the ship in the distance are both sharp. Careful focusing and a large f-number (f16 we were informed was used) ensured that all elements in the image are sharp.
Composition
It has already been mentioned about what makes this image stand out. It is the framing technique used by shooting the ship through the “frame” of the jetty. Take this away and you have a very mundane picture of a ship on the horizon. While all the main elements and techniques are here for a brilliant photograph, there are ways to improve the image.
One common “No-No” for images like this is to place the horizon in the center of the image, which is the case here. While the “splitting” effect caused by a central horizon doesn’t really take effect, if the photographer had avoided it, the image would have been improved. Crouching down and raising the camera so the horizon is placed in the lower end of the image would have lessened the amount of empty jetty space and included more sky detail, which seems to be more interesting.
Improvements
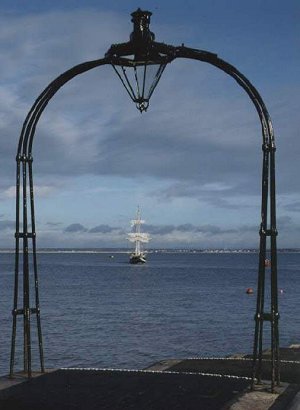
A way of improving the composition is to get in a bit closer, either by moving in or using a longer focal length lens. Either way however, would lessen the area of sharpness and make adjusting for depth of field even more critical or even impossible.
Despite our little grumbling about the composition, this is a very impressive image. It is very easy to sit back and carve up an image without realising the trouble taken to shoot it. Robert had mentioned certain problems in composing this image. Unseen obstacles can often limit how an image can be composed a point often missed in magazine critiques.
For images like this, improvements can be made at a later stage.
- Cropping an image is common practice and many images have been rescued from the trash can by using this simple technique.
- For images on screen as we are looking at now, it is simply done by using a cropping tool in the image program.
- For prints, simply cut them or cover the unwanted area with a mount. This often means enlarging the image first.
- For slides, which is the case with this image, these are trickier to crop but not impossible. Covering the unwanted area with a non-transparent material that has a clean straight edge can achieve this. You need to open the plastic slide holder and insert the mask then reassemble the slide holder. Some holders can not be re-assembled but you can purchase slide holders from your local photo supplier.
In Conclusion
This image is quite a good one; despite some minor flaws the image itself can be improved as is, with careful cropping and printing. With subjects like this it is always best to retake the image for best quality. Try and allow yourself a chance to go back for any retakes that are necessary. With subjects like cars, this is usually very possible to do.
More info…
If you want to learn more about all kinds of photography, take a look at our complete and full range of courses. All are tutor assisted with full course instruction and projects. School of Photography Courses