
Close Up Photography
The term “Close Up Photography” generally refers to images that are taken at a very close range to the subject. If we take for example a persons face, filling the frame with the face can be considered close-up, as long as there is no other elements showing in the image. If we just take a photo of a persons eye, this is even closer and is definitely classed as a close up image. So when we refer to close up photography, it is an image that closes into the subject.
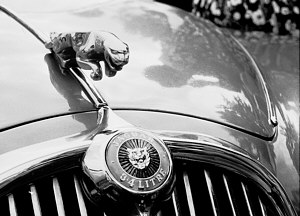
If we take these two images as an example, both are of the same type of subject but one is considered a close up while the other isn’t. The photo in fig. 1 shows the whole front grill of a 54 Cadillac. Though it pretty much fills the frame it wouldn’t be considered a close up image. The image in fig 2 is a true close up photo as the frame is filled with just a part of a car, the hood ornament of a Jaguar.
fig 1: Not Close Enough
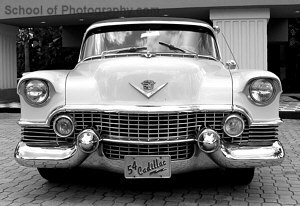
fig 2: Close-Up Image
Certain subjects immediately fall into the “close-up” category once the frame is filled with them. These are normally small objects such as insects, flowers, coins etc. Another term for images of these subjects is “Macro Photography”. This term is generally used for images taken with macro lenses that allow the camera to get closer to the subject than ordinary standard view lenses allow. Both terms loosely mean the same thing; a photo taken at very close proximity to the subject. The main difference being the macro lens can allow a closer viewpoint.
Taking a photo of a small object doesn’t necessarily class it as a close up image. It is only close up if the frame of the image is filled with the small object such as a flower or insect. Though most lenses allow the camera to get quite close, often an accessory such as close up filters or a macro lens is needed to allow the camera to get even closer. These close up tools don’t magnify the subject, they simply allow the camera to focus closer.
SLR cameras are more suited for close up photos. This is because what you see through the viewfinder or LCD digital camera monitor is what will appear in the image. Cameras with a separate viewfinder such as some compact camerasmake close up images more difficult to frame. This is because the viewfinder lens view is slightly different to the view seen by the picture taking lens. Although this is not really apparent with most subjects, at close proximities it is much more apparent.
Close up photography doesn’t necessarily mean having to use specialist equipment. Often an ordinary lens may do to focus in close enough, depending on the sizie of the subject. There are many accessories that can be added to SLR cameras in order for them to get closer to the subject. These include close up filters, extension tubes, lens bellows and true macro lenses. Although many cameras and lenses now boast a macro setting or ‘macro mode’. These may not be as true as a specifically designed macro lens, it is simply the closest focusing setting. Specifically designed macro lenses will allow a much closer focusing distance and much sharper results.
fig 3: Without Special Lenses

fig 4: With Special Lenses
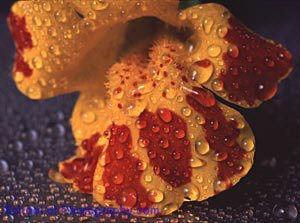
Fig 3 was taken just using a digital camera with zoom lens. No attachments were used but the camera could still get close enough to fill the frame with the subject. The image in fig 4 is a flower with water droplets sprayed upon it. It was taken with an SLR camera and close up filters. These have allowed the camera to focus closer in order to fill the frame with such a small subject.
When taking close up photos the most important factor to keep in mind is depth of field. The closer the camera is to the subject, the less area of sharpness or depth of field it will have. This means that at the point being focused upon the image will be sharp. But from as little as millimetres from this point of focus, the image may be out of focus unless you use a high f-number such as f11. This applies no matter what lens or accessory is being used.
Three simple steps to successful close-ups
- Adjust your lens to its closest focusing distance using the manual focus setting. Move in until the subject is sharp or the subject fills the frame. Re-adjust the focus before taking the photo once the composition is to your satisfaction. For cameras with only auto focus adjustment, keep moving in until the camera indicates that it cannot focus properly, then pull back until it focuses correctly.
- Use the smallest aperture as your equipment and lighting conditions will allow. The higher the f-number (aperture), the greater the area of sharpness.Apertures of f11, f16 etc will give the best results.
- Always use some sort of camera support where possible. Because of the high f-numbers required for sufficient depth of field (sharpness), shutter speeds will be slow increasing the chance of camera shake. If using flash, the chances of camera shake are significantly reduced but make sure the flash will light the subject at such close distances. Off camera flash or a lens ring flash will ensure proper lighting.
To learn much more about mastering Macro and close-up photography, enroll in our Creative Photography Course.